[Intermediate] Merging Raster Elevation Data in ArcGIS
When working with raster elevation data downloaded from the USGS, National Map, or similar sources, you will often find that your working area crosses the borders of two or more digital elevation map tiles.
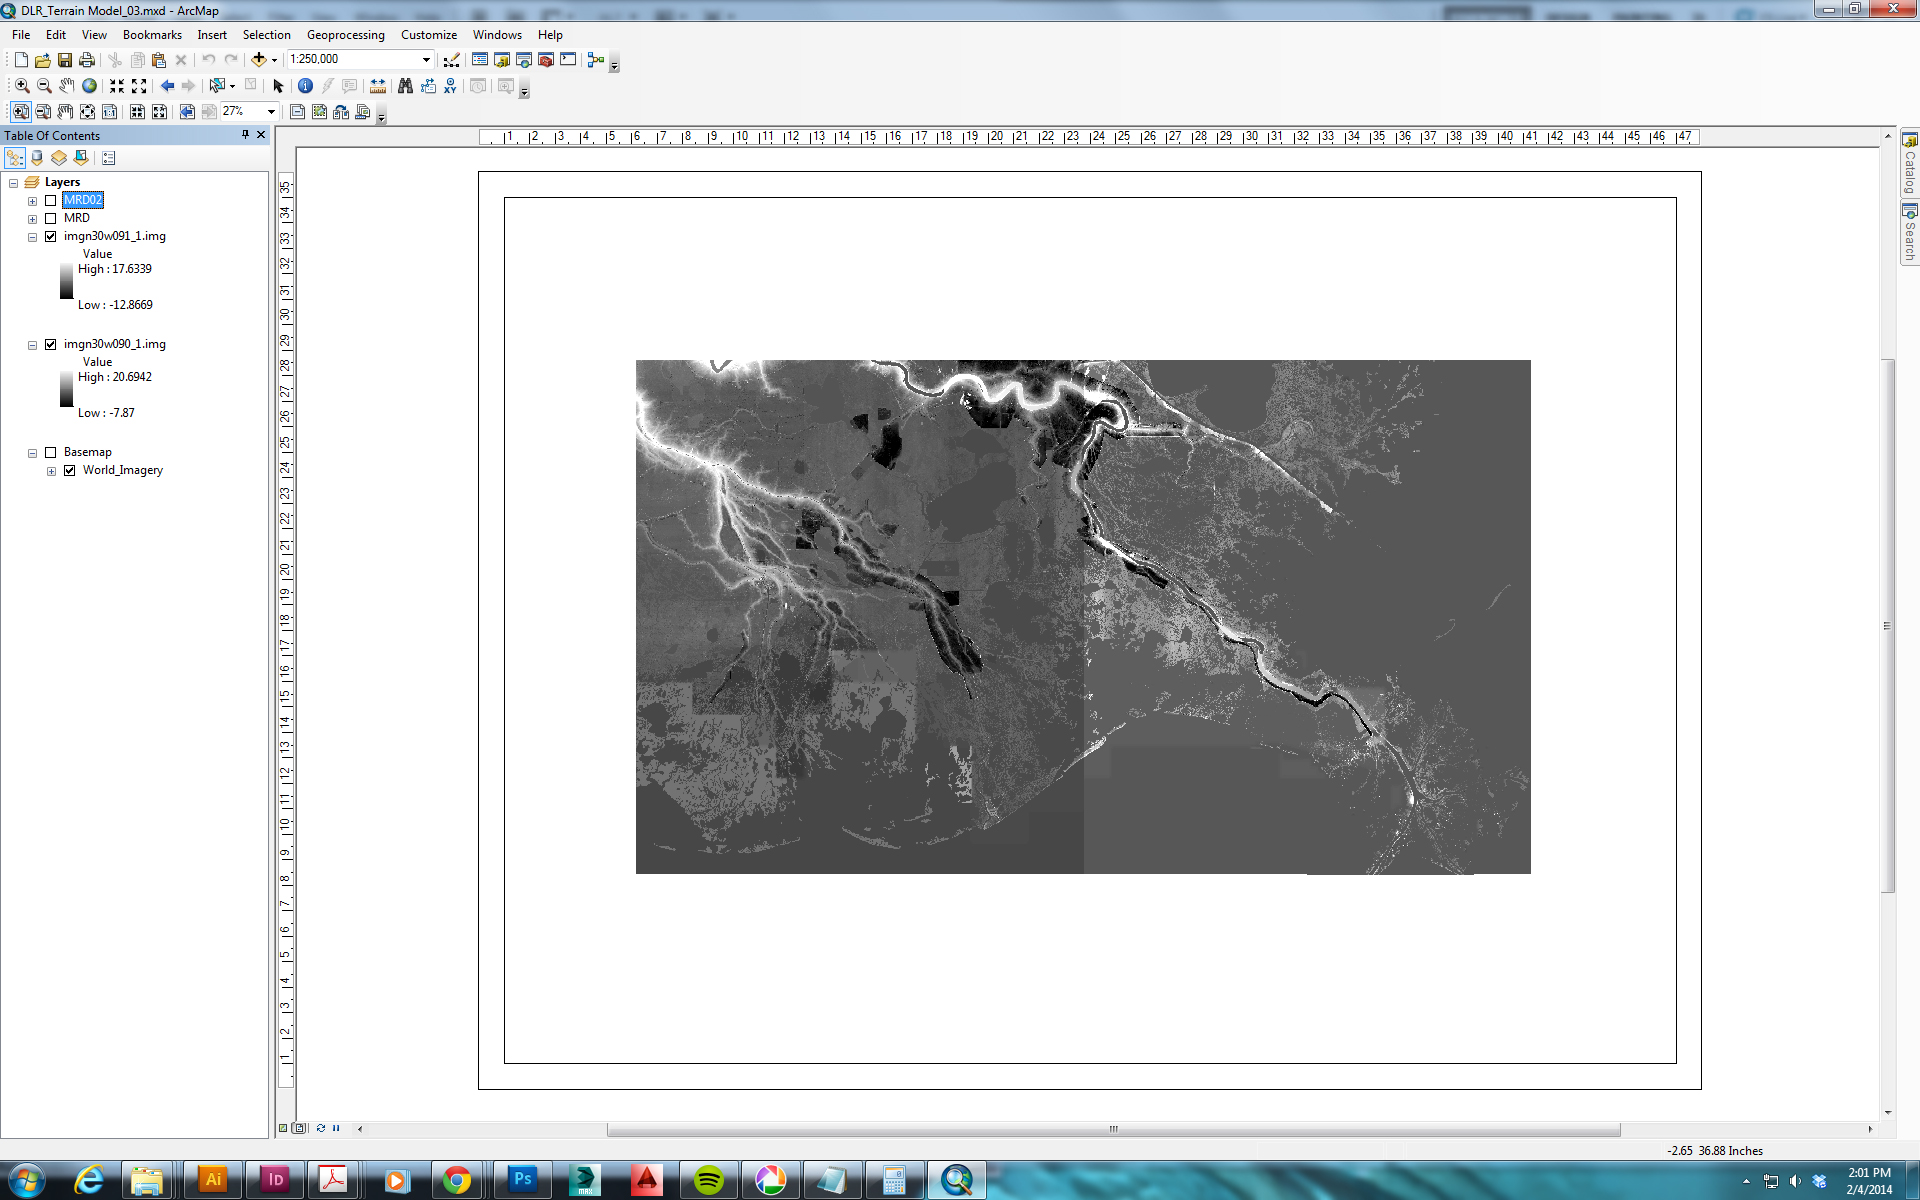
This can be problematic because the two map tiles are likely to have different value ranges, making it necessary to merge the tiles before exporting a portion of them as a TIF for creating a surface in 3ds Max. This is a step-by-step guide to merging raster elevation data in ArcGIS.
1. Create a Mosaic Dataset
Follow the instructions in this Esri tutorial under the section headings “create a file geodatabase”, “set the default geodatabase”, and “create a new mosaic dataset”. Call the geodatabase and mosaic dataset whatever you like.
During “create a new mosaic dataset”, you may want to check the pixel type properties on the source rasters (you can see this by right-clicking the raster in the catalog and looking at its properties) and set the pixel type to match on the new mosaic dataset (expand the “pixel properties” dropdown before clicking “OK” to close the Create Mosaic Dataset tool dialog box).
2. Add Rasters to the Mosaic Dataset
Follow the instructions in that same tutorial under the heading “add rasters to the mosaic dataset”. (You will use the .img or .tif raster data files you are looking to merge.) During step 3, I have found it works better to select “Dataset” instead of “Workspace”.
3. Calculate Statistics and Build Pyramids on the Raster Mosaic
You may find that the combined Raster Mosaic does not display the appropriate scale range, causing it to appear gray and blank.
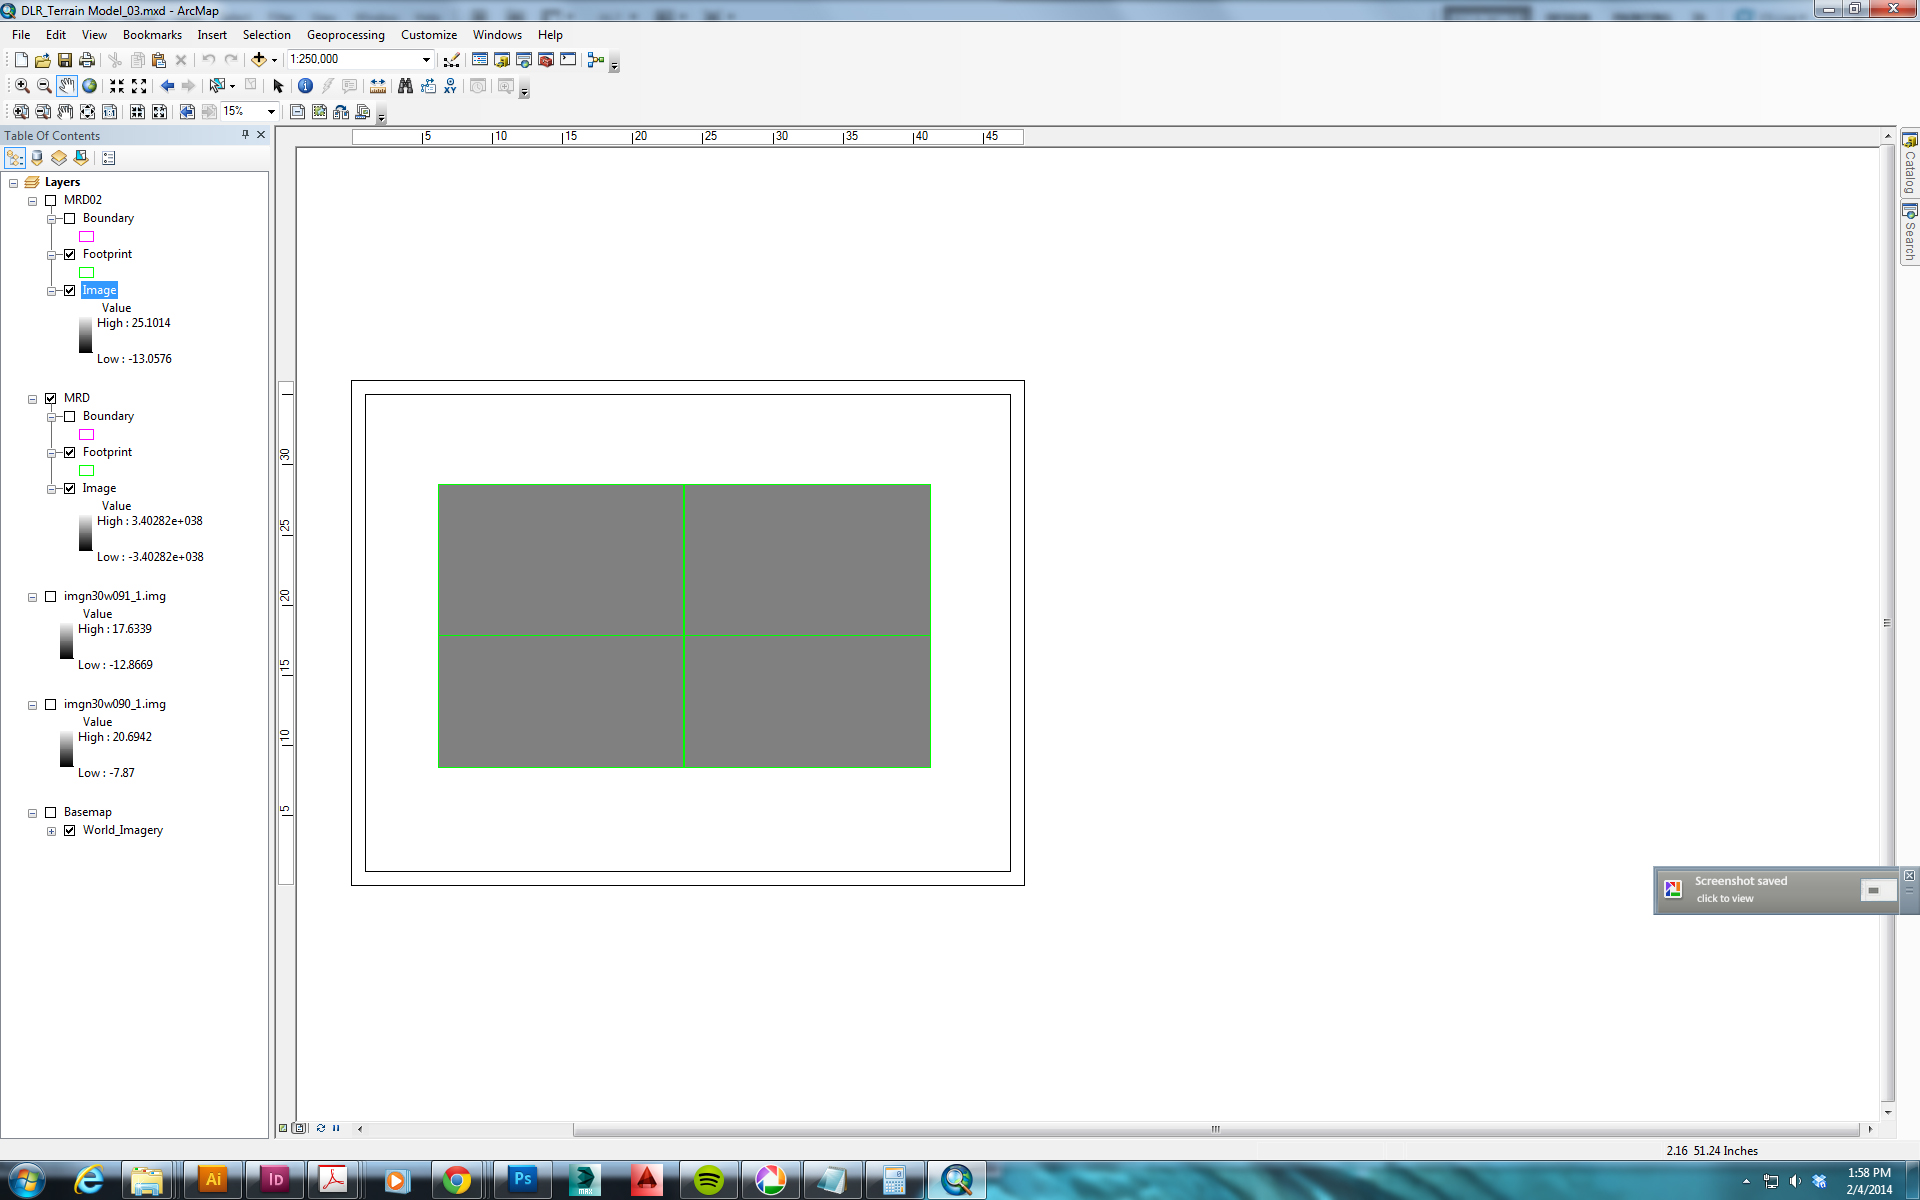
You can fix this by right-clicking the Raster Mosaic in the catalog and choosing “Build Pyramids and Statistics”.
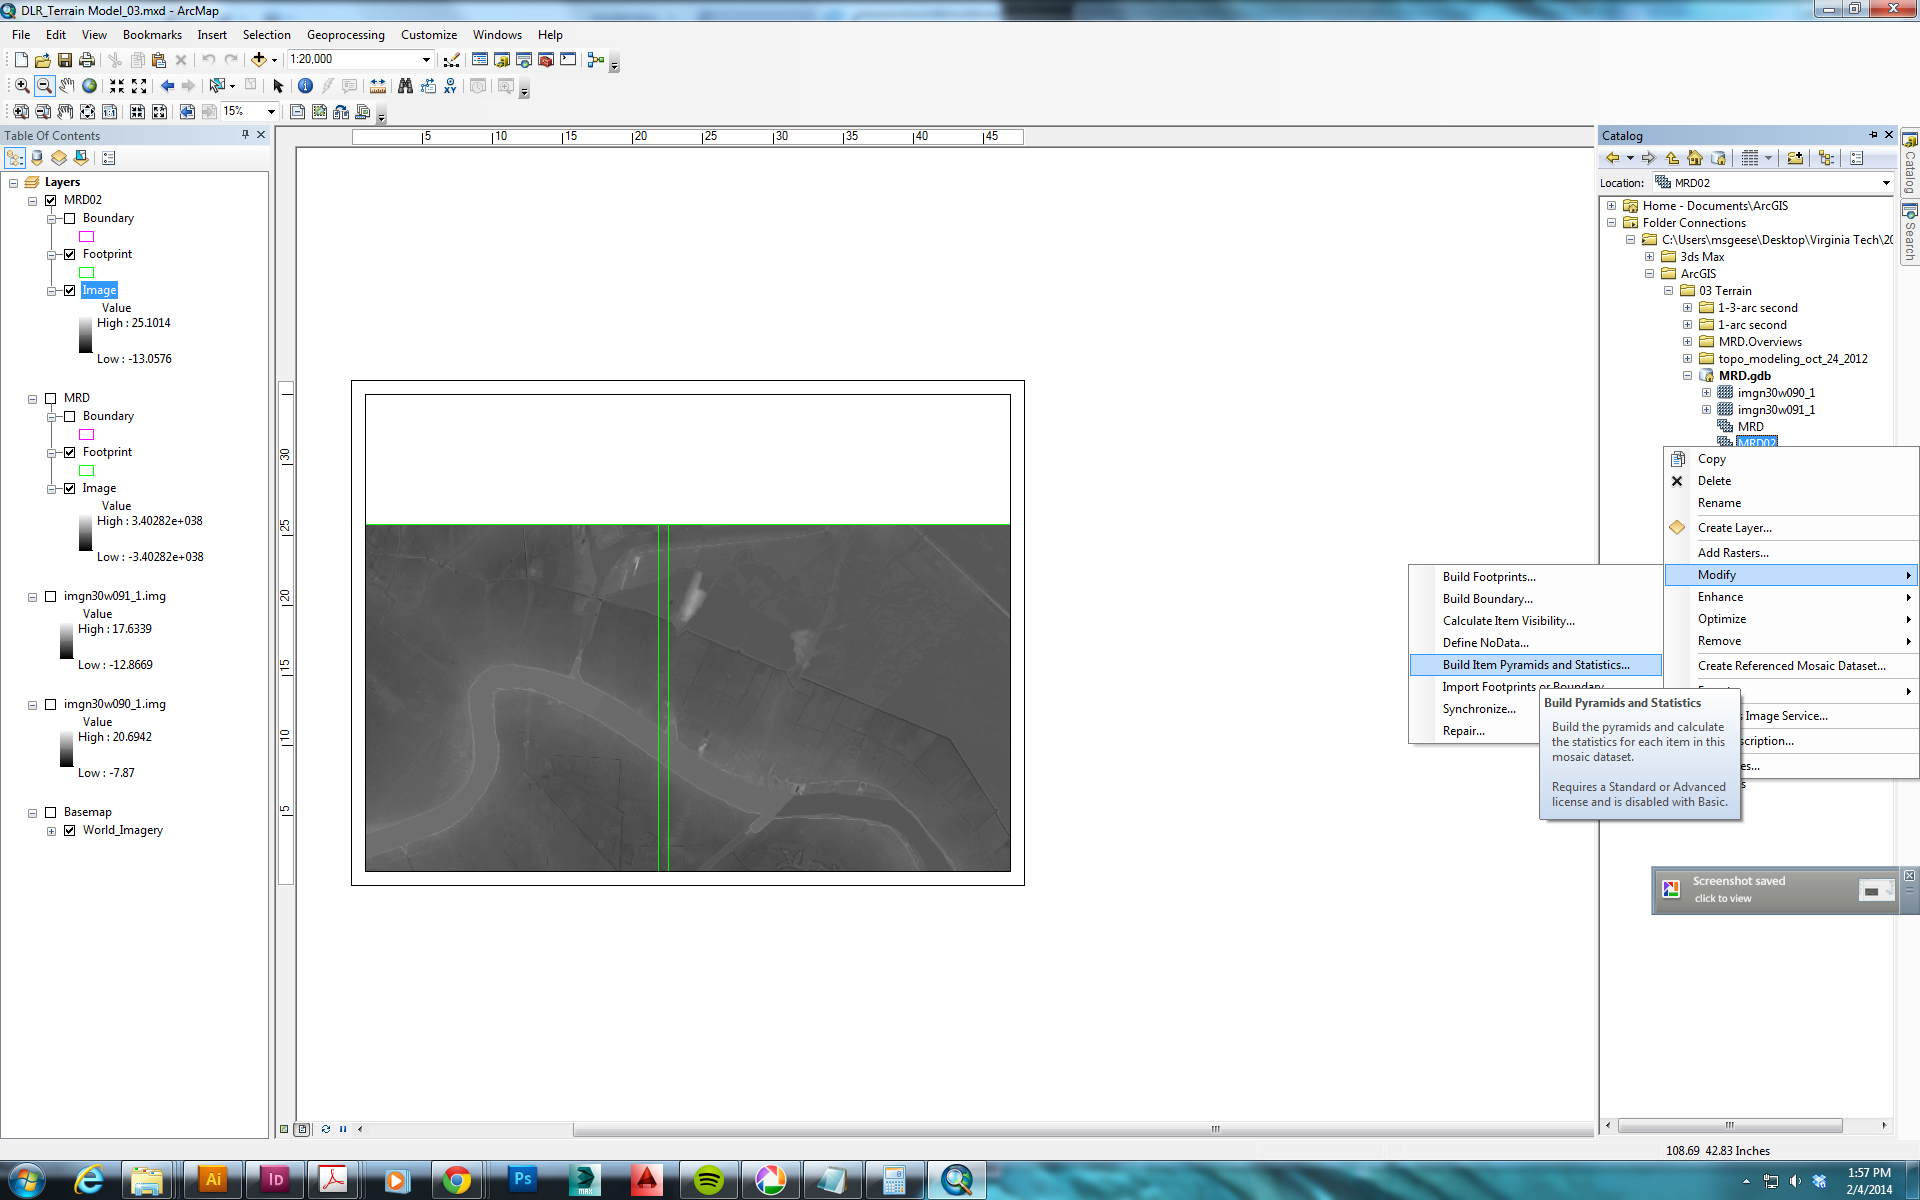
See here for additional discussion of this issue.