Here is a PDF with good instructions on procedures for saving a Rhino model as a .DWG and importing it into 3ds Max.
Read MoreInstructions
1. Download Digital Elevation Model(s) from online data sources
2. Produce cropped and aligned .TIF files from both the DEM and aerial imagery using ArcGIS
A. Create a new ArcGIS map.
B. Place your DEM(s) in the map. If necessary, merge DEMs.
C. Zoom ArcGIS to the approximate boundaries of the area you want to model.
D. Set an appropriate and ‘clean’ scale (for instance: 1:20,000) for your output from ArcGIS. Remember that default scale in ArcGIS is meters:meters. (This is fine.)
E. Use File > Export Map to save a .TIF file, at scale and cropped to the region you are interested in modeling. Under “Options” > “General”, set resolution reasonably high (i.e. 150-300 dpi) and check “Clip Output to Graphics Extent”. Under “Options” > “Format”, set Color Mode to “8-bit Grayscale” and Compression to “None”.
F. Add “Basemap” > “World Imagery” (or another aerial image layer) to the ArcGIS file, and repeat step E, ensuring that the bounds and scale of the export remain identical.
3. Following the instructions in Tutorial 18.4 “Creating a Terrain using DEM Data and the Displace Modifier” in Cantrell and Yates, transform a simple plane into a terrain model and map aerial imagery onto the terrain model in 3ds Max
+ In step 5, note that you will sometimes want to scale down the plane (and thus your terrain model) relative to real dimensions of the area you are working with, particularly when you are working with very large regions. For instance, if the region you are modeling is 100,000 m x 100,000 m, you might create a plane that is at 1:10 relative to the region (10,000 m x 10,000 m). This can help avoid creating models that are too large for the computer to handle at reasonable speeds.
+ In step 10, note that the strength value should represent the total distance between minimum and maximum elevations, not “the height of the highest point in your terrain”. This will account for models that do not start at elevation 0.
+ After step 10, you may find that your terrain model is extremely bumpy or jagged. You can fix this by gradually increasing the “Blur” value on the Displace Modifier. (Generally, a value between 2 and 4 should be sufficient to smooth the model. Lower values are desirable as they will reduce distortion in the resultant terrain model.)
+ For steps 11-14, you may need to refer to Tutorial 15.1 “Creating a Standard Material in 3ds Max” in Cantrell and Yates.
Read MoreWhen working with raster elevation data downloaded from the USGS, National Map, or similar sources, you will often find that your working area crosses the borders of two or more digital elevation map tiles.
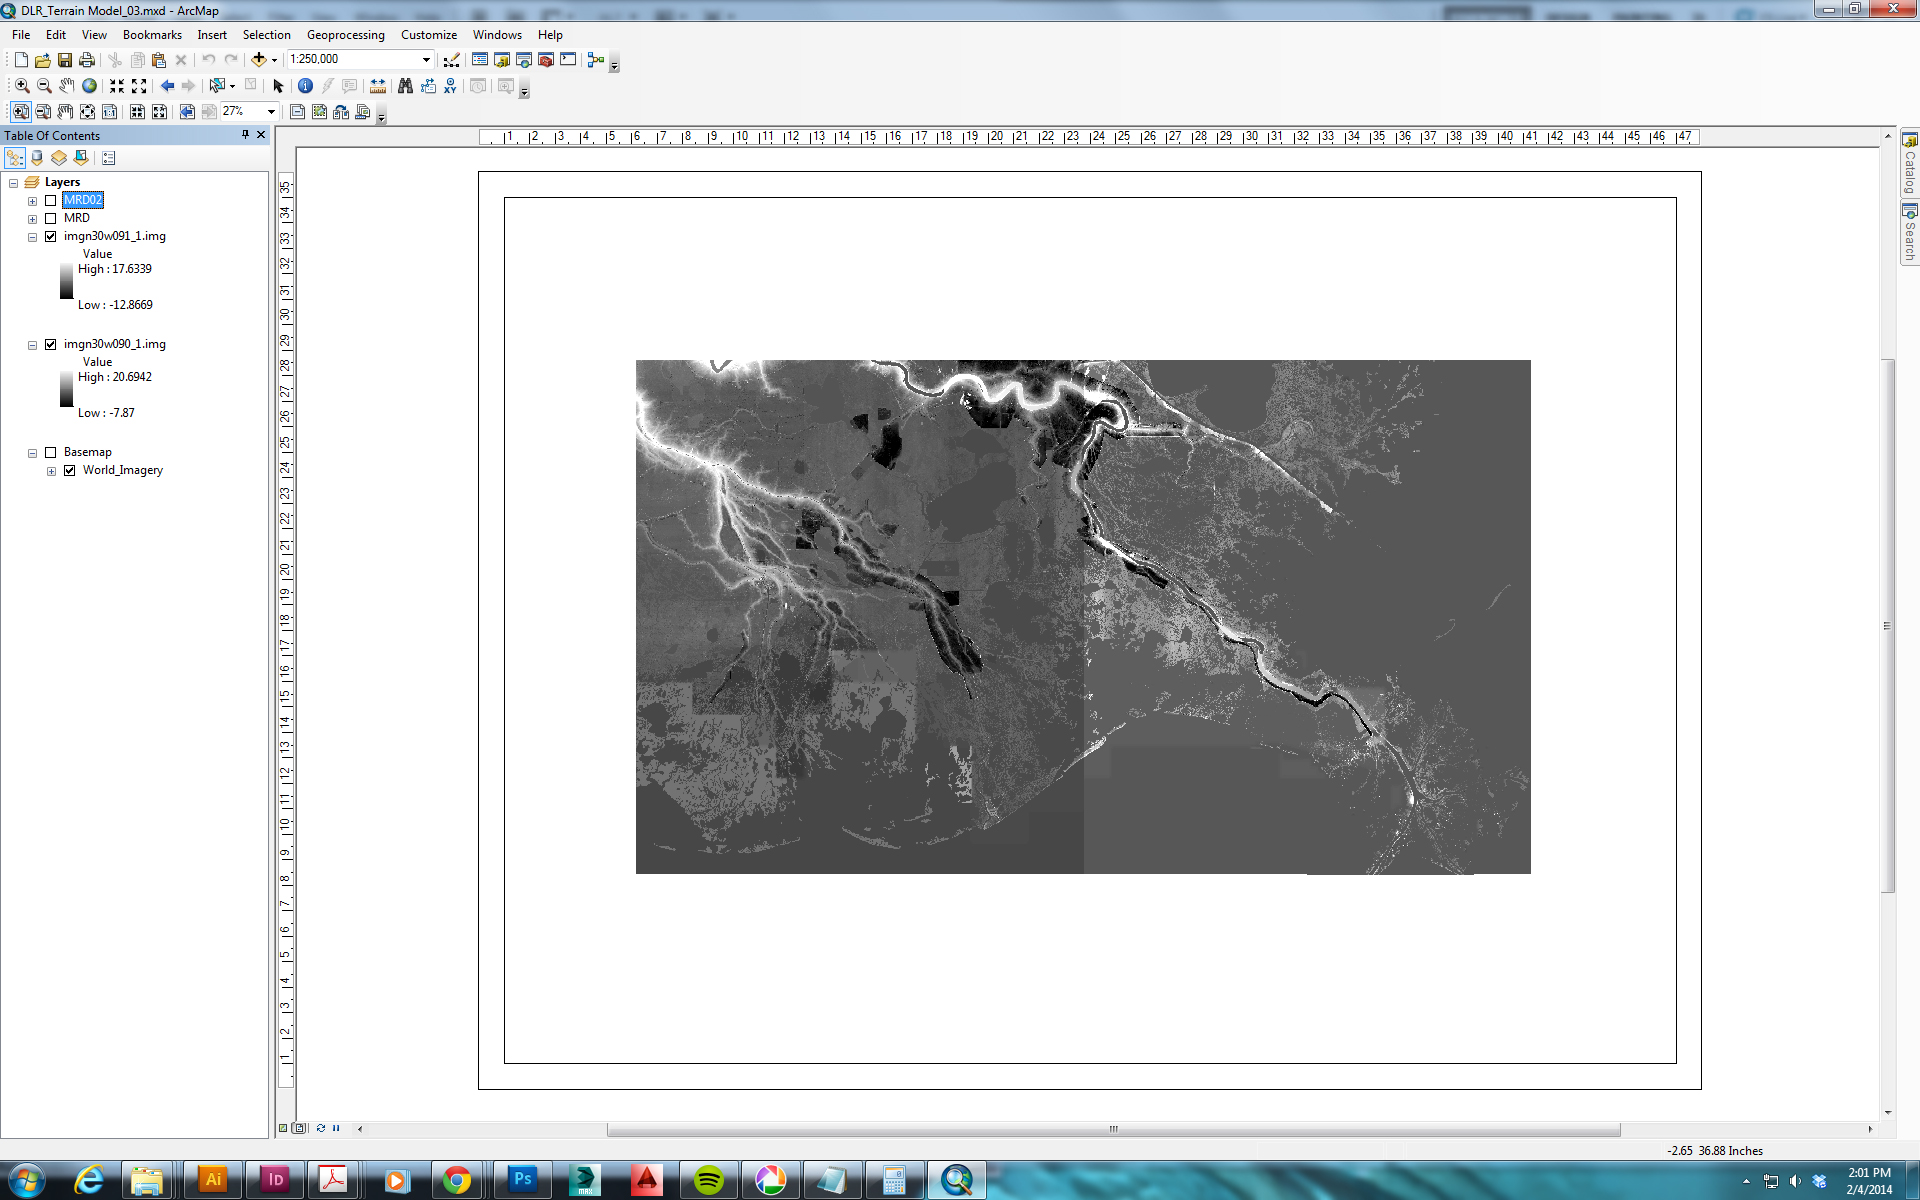
This can be problematic because the two map tiles are likely to have different value ranges, making it necessary to merge the tiles before exporting a portion of them as a TIF for creating a surface in 3ds Max. This is a step-by-step guide to merging raster elevation data in ArcGIS.
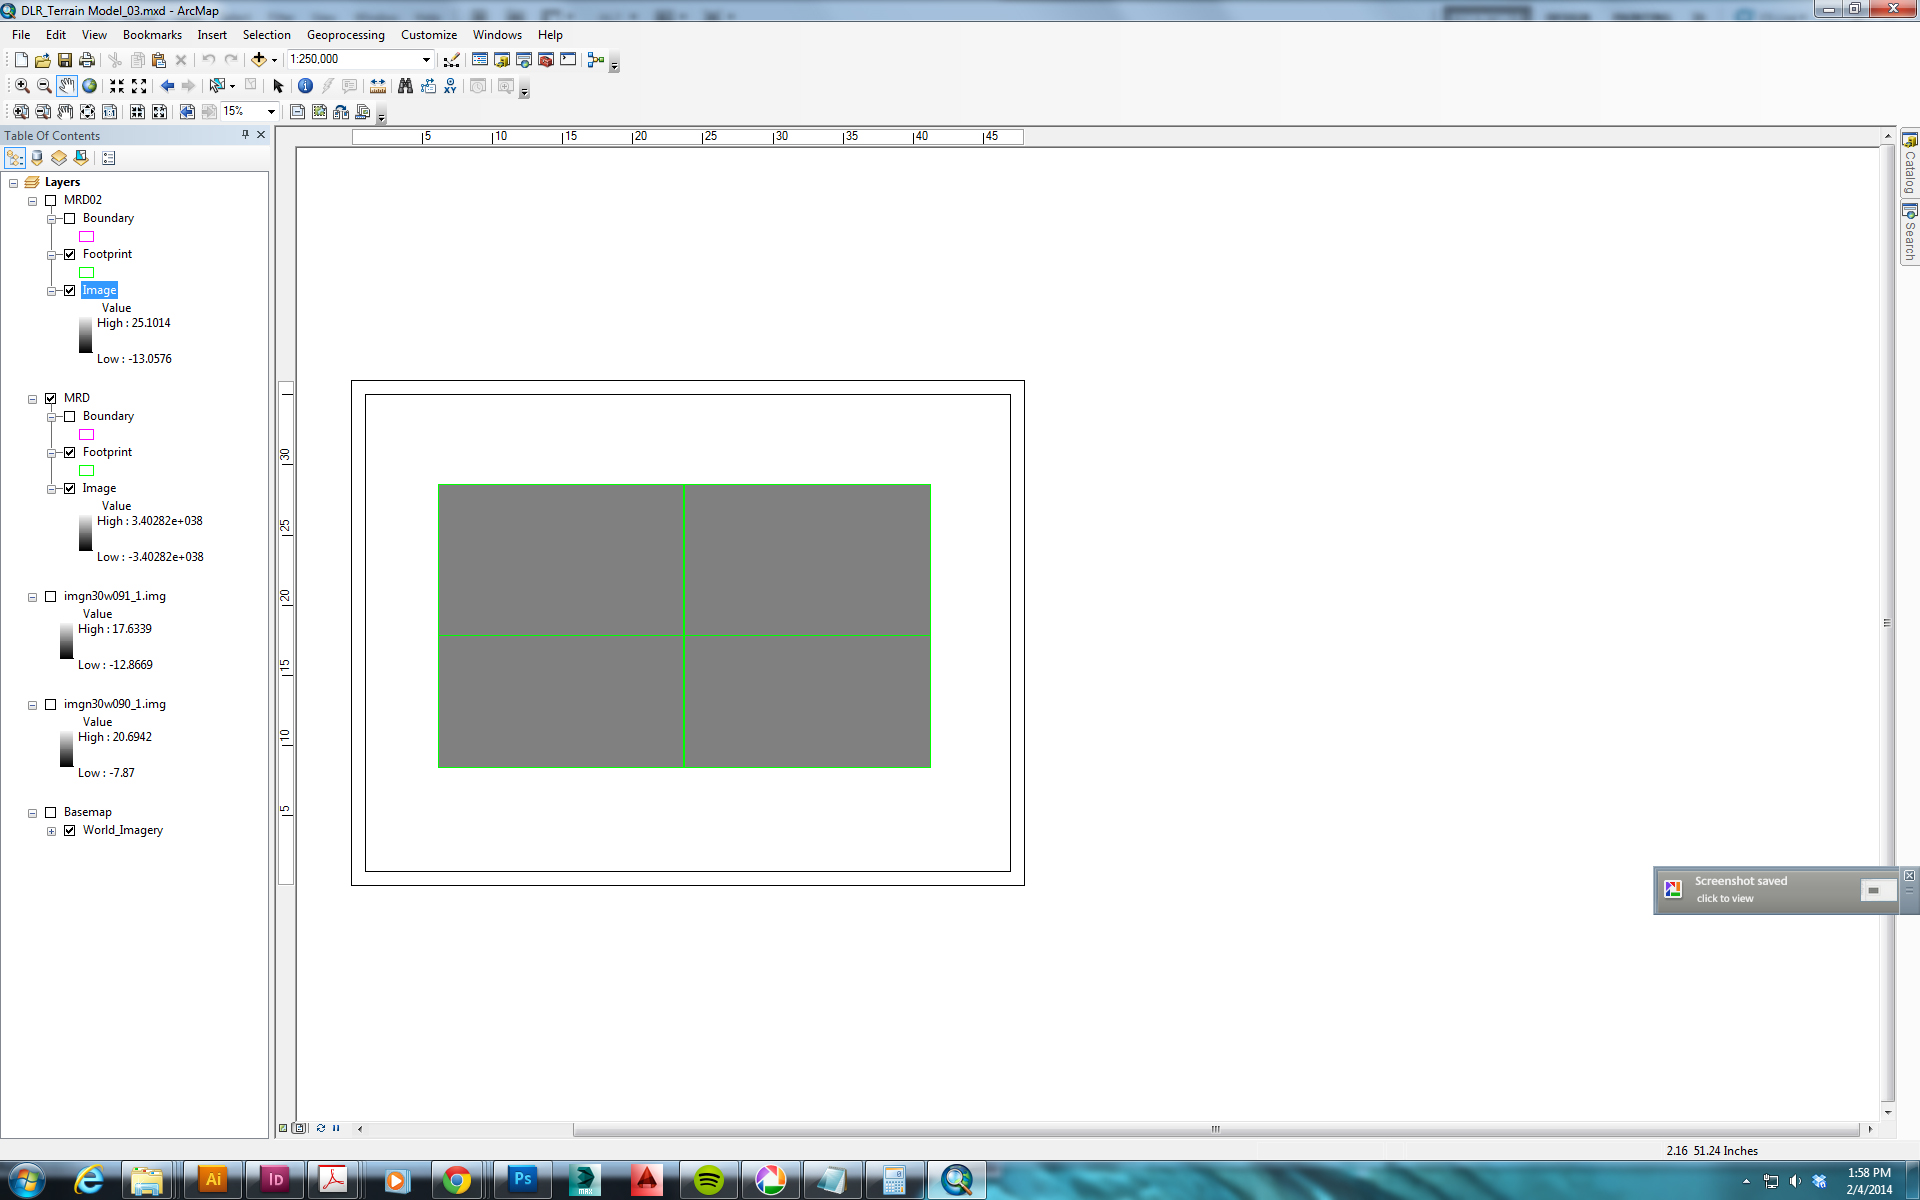
1. Create a Mosaic Dataset
Follow the instructions in this Esri tutorial under the section headings “create a file geodatabase”, “set the default geodatabase”, and “create a new mosaic dataset”. Call the geodatabase and mosaic dataset whatever you like.
During “create a new mosaic dataset”, you may want to check the pixel type properties on the source rasters (you can see this by right-clicking the raster in the catalog and looking at its properties) and set the pixel type to match on the new mosaic dataset (expand the “pixel properties” dropdown before clicking “OK” to close the Create Mosaic Dataset tool dialog box).
2. Add Rasters to the Mosaic Dataset
Follow the instructions in that same tutorial under the heading “add rasters to the mosaic dataset”. (You will use the .img or .tif raster data files you are looking to merge.) During step 3, I have found it works better to select “Dataset” instead of “Workspace”.
3. Calculate Statistics and Build Pyramids on the Raster Mosaic
You may find that the combined Raster Mosaic does not display the appropriate scale range, causing it to appear gray and blank.
You can fix this by right-clicking the Raster Mosaic in the catalog and choosing “Build Pyramids and Statistics”.
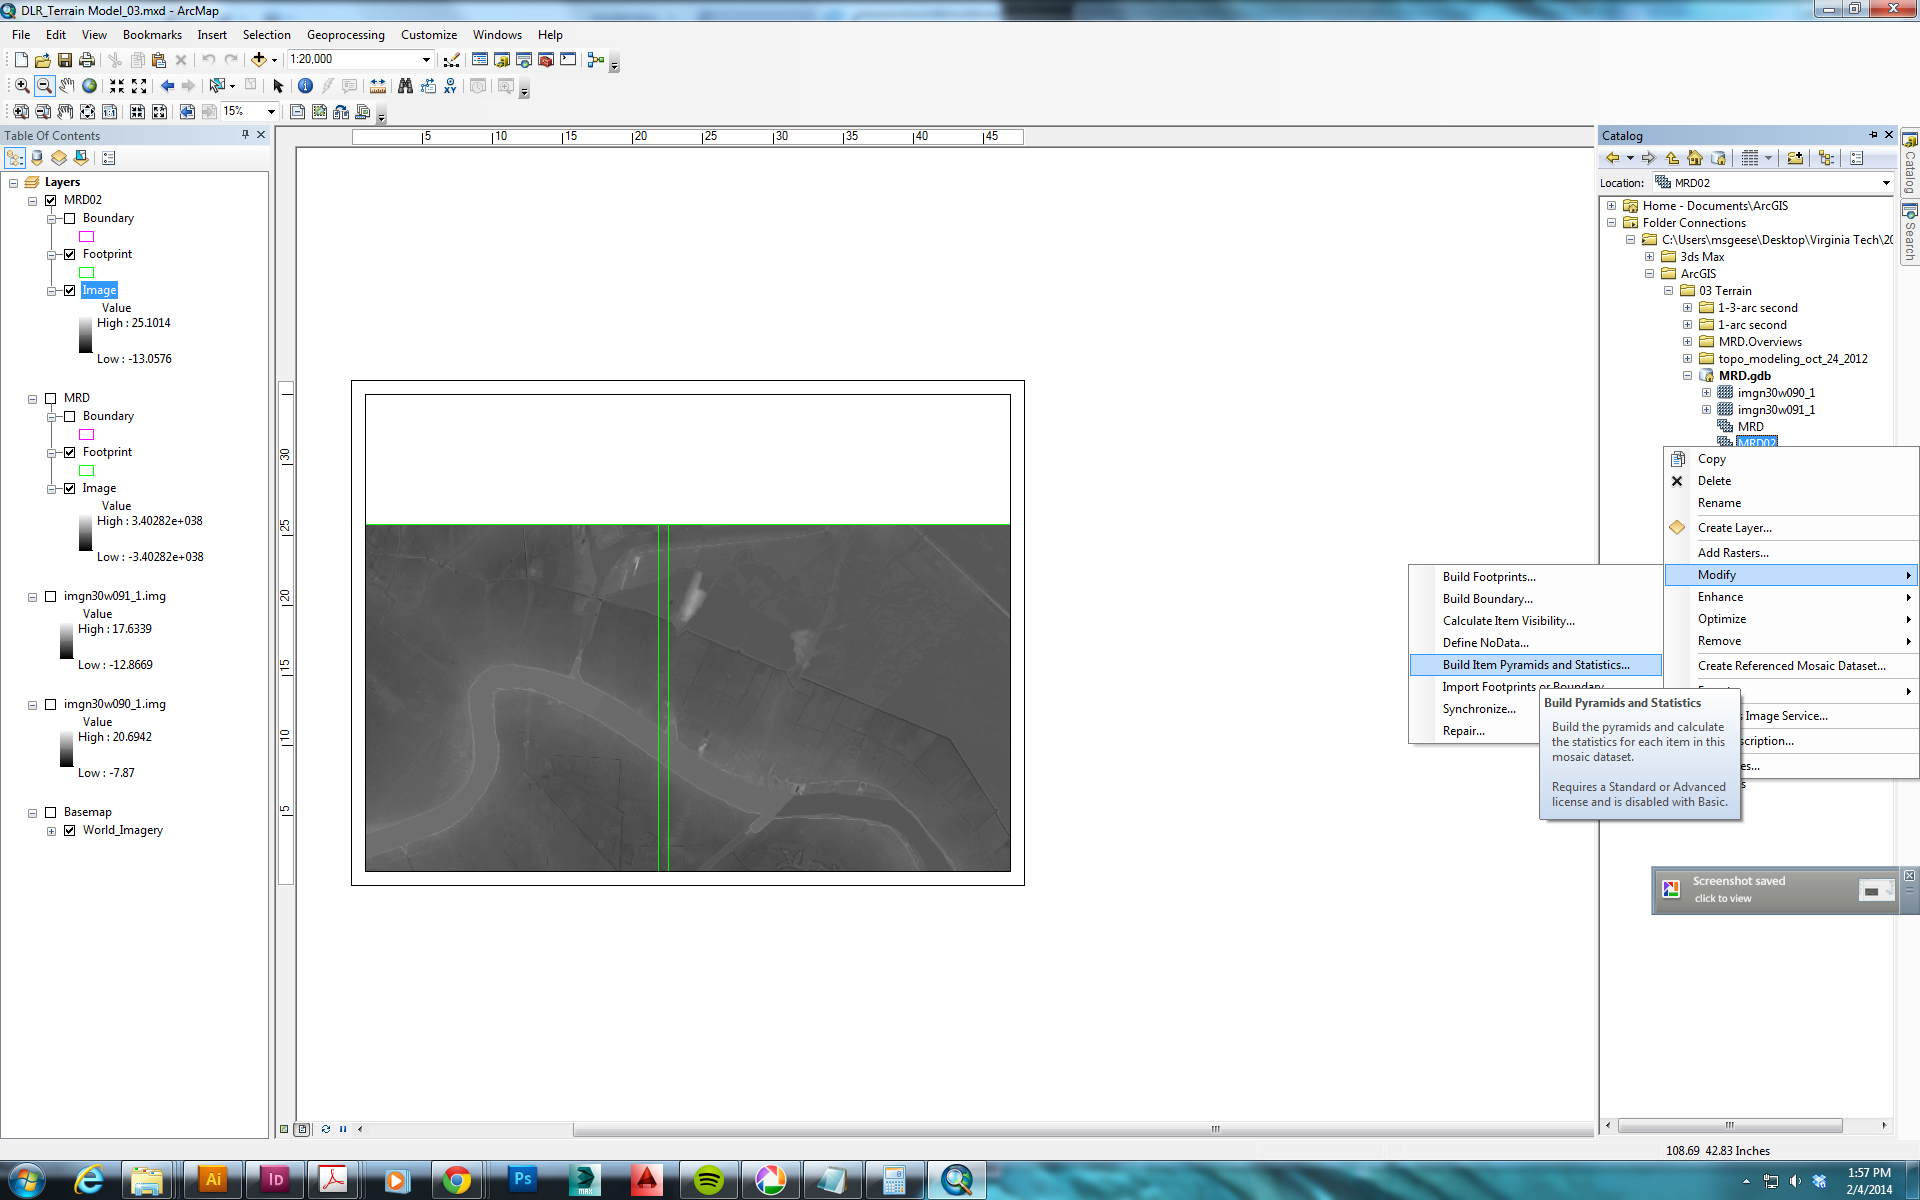
See here for additional discussion of this issue.
Read More